


Whether it’s your passport, driver’s license, or any official badge — that government ID photo is going to follow you around for years. So why not make it a great one? Let’s face it, we’ve all had that one awkward ID photo that makes us cringe every time we pull it out. The good news? You can look polished, confident, and totally professional if you follow a few simple steps.
Why First Impressions Matter
The Power of a Photo
Your government ID photo isn’t just a routine requirement — it’s often the first impression you make in serious, professional, or legal situations. Think about it: whether you’re at the DMV, applying for a security clearance, or traveling internationally, that small 2×2 inch image represents you when you’re not there to speak for yourself. It may be a minor detail in your daily life, but it holds major weight in official matters. A good ID photo communicates clarity, confidence, and a level of care in how you present yourself.
Professionals often underestimate the impact of a well-prepared government ID photo. It’s not about looking glamorous — it’s about appearing put-together and dependable. In fact, this image may be used or referred to for years in critical situations. If your photo shows you looking tired, messy, or unprofessional, it could subtly influence the perception of others. That’s why putting effort into your ID photo is an easy win when it comes to first impressions.
Your ID as a Reflection of You
Your ID serves as a constant visual representation of your identity. Whether you’re going through TSA at an airport, entering a secure building, applying for a government job, or attending a professional conference, your ID photo may be the only thing someone sees before interacting with you. You want that photo to reflect you in your best light—calm, composed, and ready for whatever lies ahead.
A clean, professional photo sends the message that you respect yourself and the processes you’re part of. It shows that you’re detail-oriented and take responsibilities seriously. Especially in the U.S., where identification is used frequently for everything from job applications to voter registration, your image should reflect someone others can trust and rely on.
Checklist for First Impressions in ID Photos:
- Choose clean, appropriate clothing
- Maintain a neutral, composed expression
- Be well-groomed and neat
- Avoid distractions in the background or outfit
- Look directly into the camera with confidence
Before the Photo – Preparation is Key
Know the Guidelines
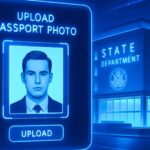
Before you even think about picking an outfit or fixing your hair, you need to check the specific requirements for the photo you’re taking. In the U.S., different government agencies — such as the DMV, Passport Office, or USCIS — have different photo regulations. For example, passport photos must have a plain white background, require a neutral expression (no smiling with teeth), and must show the full face without shadows. On the other hand, driver’s license photos may allow slight smiles and colored clothing, depending on the state.
Failure to follow these guidelines could mean your photo is rejected, wasting time and money. It’s crucial to visit the official website or call ahead to ensure you’re informed. Some agencies prohibit wearing white shirts (because you’ll blend into the background), and others disallow any headwear unless it’s for religious reasons. Knowing these rules helps you prepare properly and avoid last-minute stress.
Photo Guidelines to Double Check Beforehand:
- Is smiling allowed?
- What color background is required?
- Can you wear glasses or hats?
- Are there clothing color restrictions?
- Is there a size or resolution requirement for the image?
Get Plenty of Rest the Night Before
Sleep isn’t just essential for your health — it’s a beauty tool, too. Getting a full 7–8 hours of rest the night before your ID photo can dramatically improve how you look. Puffy eyes, dark circles, and dull skin all make you appear tired and less vibrant. When you’re sleep-deprived, it shows — and unfortunately, a government ID photo captures every bit of that.
Being well-rested also helps you feel more alert and confident, which reflects in your posture and facial expression. You’re more likely to hold your head high, smile subtly, and exude calmness. So make it a priority the night before your photo appointment: turn off screens early, stick to a regular bedtime, and consider a calming nighttime routine to help you wind down.
Pre-Photo Sleep Tips:
- Aim for 7–8 hours of uninterrupted rest
- Avoid caffeine and alcohol before bed
- Shut off screens at least 1 hour before sleeping
- Use an eye mask or blackout curtains if needed
- Keep your phone on silent to avoid interruptions
Hydrate and Eat Right
What you put into your body the day before and the day of your photo matters more than you think. Drinking plenty of water will help your skin appear smoother, more hydrated, and fresh. On the other hand, eating salty or processed foods can lead to puffiness, especially around your eyes and face — not ideal for a high-definition close-up.
Start hydrating the day before and avoid heavy meals that make you feel sluggish or bloated. Eat light, nutritious meals rich in fruits, veggies, and lean proteins. These kinds of foods can help boost your skin’s natural glow and reduce inflammation. Trust us, you’ll look and feel better — and that confidence will shine through in your photo.
Pre-Photo Diet & Hydration Checklist:
- Drink 6–8 glasses of water the day before
- Limit sodium and sugar intake
- Avoid alcohol — it dehydrates your skin
- Eat a balanced breakfast on the day of
- Include vitamin-rich foods like berries, nuts, and leafy greens
Dress for Success
What Colors to Wear
When it comes to government ID photos, the color of your clothing plays a bigger role than you might think. Choosing the right color can help your facial features pop while giving off a clean, professional vibe. Opt for solid, medium-to-dark tones like navy blue, charcoal gray, forest green, or burgundy. These colors not only photograph well but also lend a sense of seriousness and sophistication. Bright neon colors, on the other hand, can reflect light awkwardly and make your photo look unprofessional.
It’s also smart to avoid wearing white, especially if the background of your photo is white — which it often is for passport or visa photos. You don’t want to blend into the background and appear like a floating head! If you need something light-colored, go for soft neutrals like beige, cream, or light gray. These shades provide contrast while still keeping things simple and elegant.
Avoid Distracting Patterns
Patterns might be trendy, but they’re a bad idea for ID photos. Stripes, plaids, polka dots, and logos can all distract from your face, which is the whole point of the picture. Even worse, some patterns cause moiré effects (weird optical illusions) on camera, which can ruin the clarity of your image. You want people to focus on you — not your shirt.
Solid colors are your safest bet. If you do wear a pattern, make sure it’s extremely subtle and not too busy. Also, avoid wearing anything with words or branding. Government ID photos are not the place to showcase your favorite sports team or your latest fashion statement. Simplicity wins here, every time.
Why Neutral Tones Work Best
Neutral colors like gray, tan, black, navy, and olive are ideal for ID photos because they don’t clash with the background or overwhelm your features. They’re timeless and won’t look dated, even years later when your ID is still in use. Neutrals also tend to work well with a variety of skin tones and lighting conditions, making them a reliable option across the board.
Plus, neutral tones help create balance in your photo. Bright reds, yellows, or neon greens can cast strange reflections on your skin, while neutrals keep the focus exactly where it should be — on your face. This makes it easier for facial recognition software to do its job and ensures a cleaner, more professional result.
Consider Your Neckline
Believe it or not, your neckline can impact how professional and put-together you appear in your ID photo. V-neck and crew neck styles are generally the best options — they frame your face nicely and look great in cropped images. Avoid anything too low-cut or strappy. Thin straps might get cropped out of the frame and make you look like you’re not wearing a shirt at all.
Also, be mindful of bulky collars or hooded sweatshirts. These can cast shadows or make your shoulders look hunched. Stick with tops that lay flat and smooth. If you’re wearing a button-down or a blouse, check that the collar is straight and everything is clean and pressed. Details matter more than you think in close-up photos.
| Item | Recommended | Avoid |
| Shirt Color | Navy, gray, forest green, burgundy | White, neon, light yellow, red |
| Pattern | Solid colors | Stripes, plaids, logos, text |
| Neckline | V-neck, crew neck, button-down | Deep cuts, spaghetti straps, hoodies |
| Fabric | Matte cotton or polyester blends | Shiny, wrinkled, or see-through fabrics |
| Accessories | Minimal or none | Statement jewelry or distracting pieces |
Grooming Tips for a Polished Appearance
Hair Styling Advice
Your hair doesn’t need to be runway-ready, but it should look clean, neat, and intentional. If your typical style includes curls, waves, or a slick back — go with it! Stick to the look you normally wear on a professional day. If you plan to get a haircut, schedule it 2–3 days before the photo so it looks fresh but not too sharp or red from clippers. Avoid making any drastic changes right before the photo — it could throw off your entire look.
For longer hair, make sure it’s not covering your face. Tuck it behind your ears or tie it back loosely if needed. Keeping your face unobstructed not only looks better but is also a requirement for most official ID photos. Flyaways? Use a small amount of product to smooth them down. If your hair tends to frizz, a touch of leave-in conditioner or anti-frizz serum can go a long way.
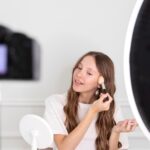
Makeup Tips (For Those Who Wear It)
Makeup should enhance, not overpower. A light layer of foundation or concealer can even out your skin tone, while a soft, matte powder helps reduce shine — especially important under bright lights. Skip the glitter, shimmer, or dewy highlighters, which can reflect flash and make your face look oily. Keep your makeup neutral and natural.
A little mascara and neutral eyeshadow can make your eyes pop, and a touch of lip balm or nude lipstick keeps your lips from looking dry or washed out. Eyeliner is okay but avoid heavy wings or dramatic styles. You’re aiming for a “clean and confident” look, not a night-out glam. When in doubt, go simple. You want to look like yourself — just your best self.
Facial Hair – Clean Shaven or Well-Kept
For men (or anyone with facial hair), the key is grooming, not complete removal — unless that’s your usual look. If you’re usually clean-shaven, make sure to shave that morning with a fresh blade to avoid irritation and redness. If you normally wear a beard or mustache, keep it trimmed and neat. Use beard oil or balm to avoid stray hairs and add a bit of polish.
What matters most is consistency. Your ID should resemble your everyday appearance, so don’t go for a drastically different facial hair style unless you plan to maintain it long-term. Patchy or unkempt facial hair can make you look sloppy, even if the rest of your appearance is on point.