


There’s a common misconception that official photos must look stiff and expressionless. While it’s true that most government or corporate ID photos require neutral expressions and standardized backgrounds, that doesn’t mean you have to look robotic. You can appear natural, approachable, and confident—without breaking any rules. The key lies in understanding where formality ends and authenticity begins.
This guide explains how to find that balance. Whether you’re taking your passport photo, a company badge image, or an ID for a licensing application, you’ll learn how to look like yourself while still adhering to all necessary technical regulations.
1. What “Natural” Actually Means in an ID Photo
When agencies refer to “natural appearance,” they typically mean:
- Your everyday look, without dramatic enhancements.
- Neutral expression (not smiling widely—but not tense either).
- Visible facial features, unobstructed by hair, glare, or makeup.
- Clear, properly lit photo without distortion.
In practice, that translates to comfortable posture, mild facial relaxation, and absence of distracting elements.
| What Looks Natural | What Gets Rejected |
|---|---|
| Slightly relaxed face | Smiling with full teeth |
| Neutral eyes | Narrowed or squinted eyes |
| Balanced posture | Head tilt or leaning |
| Everyday grooming | Heavy contour or stage makeup |
| Subtle self-confidence | Forced expression or blank stare |
2. The Formal Requirements You Can’t Ignore
Before thinking about appearance, make sure your photo matches the technical criteria. Although details vary between authorities, most follow similar rules.
| Requirement | Typical Standard |
|---|---|
| Expression | Neutral, eyes open |
| Background | White or light gray |
| Head Position | Straight, centered |
| Lighting | Soft, even, no shadows |
| Photo Size | 2×2 in (US) / 35×45 mm (EU) |
| Resolution | 600×600 px or higher |
| Editing | No filters or facial retouching |
If you don’t meet these standards, the photo may be rejected regardless of how natural you look.
3. How to Look Natural Without Breaking the Rules
A relaxed yet compliant photo starts long before the shutter is pressed.
3.1 Posture and Alignment
- Stand or sit straight, shoulders down.
- Don’t tilt your head—look directly forward.
- Allow a small amount of space above your head.
- Imagine you’re greeting someone professionally, not posing.
3.2 Facial Expression
Think of it as “calm focus.”
Try this simple preparation technique:
- Take a slow breath in.
- Exhale gently.
- Drop your shoulders.
- Look straight at the camera.
- Slightly tighten the corners of your mouth—not a smile, but not a blank face either.
This creates a natural, composed expression.
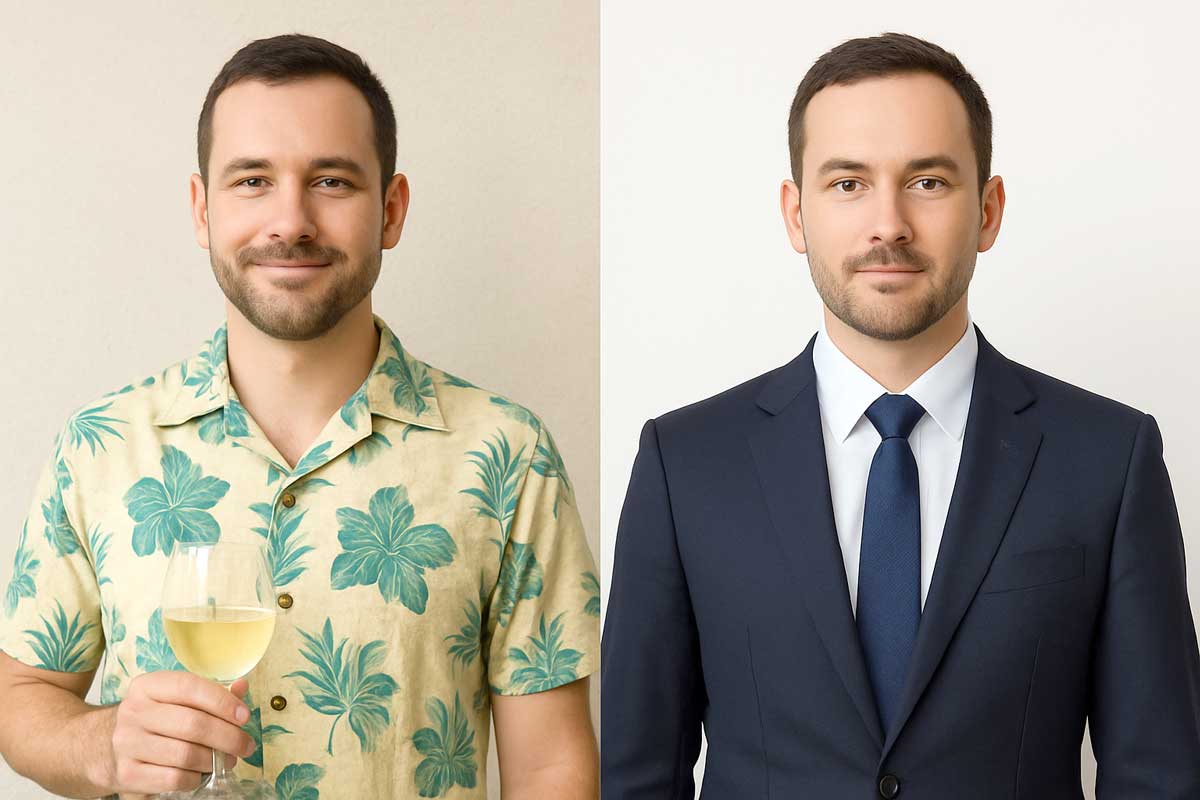
4. Clothing: Professional Doesn’t Mean Uncomfortable
Clothing plays a major role in how natural you appear.
| Recommended | Avoid |
|---|---|
| Solid mid-tone colors (navy, charcoal, forest green) | Pure white (blends with background) |
| Matte fabrics | Shiny textiles |
| Simple neckline | High collars or hoodies |
| Everyday style | Formal look you’d never normally wear |
| Light layering | Bulky sweaters or jackets |
You don’t need to wear formal attire—just something you’d choose when meeting someone important in a professional context.
5. Hair and Grooming: Stay True to Your Usual Look
- Keep hair away from the face so both eyes and ears are visible.
- If you normally wear glasses, you may keep them—but ensure there’s no glare.
- Smooth flyaways, but don’t force an unnatural hairstyle.
- If you use makeup daily, apply it lightly—avoid shimmer, heavy contour, and bright lip colors.
Remember: The photo should reflect how you typically appear during official interactions.
6. Lighting: How to Look Natural Without Overexposing
Poor lighting often causes stiff facial expressions because people squint or tense up without noticing.
Ideal Natural Lighting Setup
- Position yourself facing a large window (no direct sun).
- If necessary, use two lamps slightly behind the camera to balance shadows.
- Avoid overhead lighting.
| Best Option | Acceptable | Avoid |
|---|---|---|
| Indirect daylight from front | Soft LED lamps | Strong directional light |
| Window + sheer curtain | Two diffused lamps | Ceiling spotlights |
| Noon on cloudy day | Morning/evening soft light | Harsh midday sun |
7. Practice Without Overthinking
Most people freeze when they know the photo is “official.” The more prepared you are, the less pressure you’ll feel during the real capture.
Training tip:
Use your phone front camera and practice looking at yourself without adjusting expression. Record a short video instead of taking stills. Then capture a frame where you appear relaxed. This is often more natural than trying to hold a static pose.
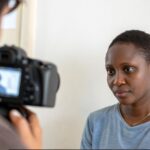
8. Capturing the Photo: Step-by-Step
- Set the camera at eye height.
- Use the rear camera if possible—it produces sharper photos.
- Stand one meter away from the background.
- Activate a 3–5 second timer.
- Relax body → fix posture → focus eyes moments before capture.
- Take several shots, adjusting slightly between attempts.
- Choose the most neutral, not the most “perfect” photo.
The best ID photos often don’t feel like the “best” during the shoot—they simply appear balanced on review.
9. Review Checklist: Natural and Compliant
☑ Background solid and shadow-free
☑ Head centered, straight, and fully visible
☑ Eyes looking directly at camera
☑ Neutral, relaxed expression
☑ Skin tone accurate (no overexposure)
☑ No glare on glasses
☑ No heavy edits or filters
10. Final Tips from Professionals
- Drink a glass of water 30 minutes before. It helps remove facial tension.
- Don’t rush—emotion shows through muscles.
- Avoid last-minute mirror checks; they usually cause overcorrection.
- If you’re nervous, imagine you’re preparing for a meeting rather than taking a photo.
Conclusion
A natural-looking ID photo doesn’t come from smiling or posing—it comes from being comfortable while complying with formal standards. When you understand the limits (background, lighting, expression) and optimize the areas where you do have flexibility (posture, grooming, mindset), the result is both professional and authentic.
Your official photo should identify you, not distort you. Think confident rather than stiff, composed rather than expressionless. With the right approach, the difference is clear.