
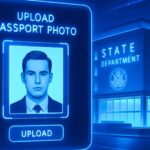


Taking a visa photo at home sounds easy and convenient, right? No long lines, no rush, and you can do it anytime. But here’s the catch: visa photos have strict requirements that, if not followed, can lead to your application being rejected. So, what exactly should you avoid when snapping that crucial visa photo at home? Let’s dive into the details to help you get it right the first time!
Visa Photo Requirements
Before you even think about taking your visa photo at home, it’s crucial to understand the exact requirements that US authorities demand. Visa photos are not just ordinary snapshots; they must meet very strict criteria set by the U.S. Department of State. These guidelines cover everything from the size and background to your facial expression and even the technical quality of the image. If your photo doesn’t follow these rules, your visa application could be delayed or outright rejected, costing you time and effort. So, learning these standards beforehand is essential to avoid headaches later on.
Photo Size and Dimensions
One of the most critical visa photo requirements for the United States is the exact size of the photo. The US visa photo must be precisely 2 inches by 2 inches (51 mm by 51 mm). This is not just a recommendation but a strict rule. The reason size matters so much is that the government’s facial recognition technology and human reviewers rely on these exact dimensions to verify your identity accurately. If your photo is even slightly off—too large, too small, or incorrectly cropped—it can cause your visa to be delayed or denied.
In addition to the overall size, the size of your head within the photo also has specific requirements. Your head (from the bottom of the chin to the top of the head) should measure between 1 inch and 1 3/8 inches (25 mm to 35 mm). This ensures that your face is clearly visible and not too small or too close-up in the photo. Paying close attention to these size details before submitting your visa photo will save you from having to retake and resubmit it multiple times.
Background Requirements
The background of your visa photo must be plain, either white or off-white, with no patterns, textures, or objects visible. This requirement is strict because the background needs to provide a clean, distraction-free contrast to your face, helping officials easily distinguish your features. Any shadows, objects, or colored backgrounds can cause the photo to be rejected, as they interfere with the clarity of the image.
Lighting plays a big role here as well because shadows or uneven lighting can create areas of darkness on the background, which is not acceptable. The background should be smooth and consistent, without any gradients or changes in tone. A good tip is to stand a few feet away from the wall or background surface to avoid casting shadows and to use natural or evenly diffused lighting. Keeping these background standards in mind will increase your chances of your photo being accepted on the first try.
Common Mistakes to Avoid When Taking a Visa Photo at Home
Taking a visa photo at home can save time and money, but many people unknowingly make common mistakes that cause their photos to be rejected. The key to success is knowing exactly what to avoid so your photo meets official requirements. Below are the most frequent errors to watch out for, each explained in detail to help you get it right on your first try.
Improper Lighting
Lighting plays a crucial role in the quality of your visa photo, yet it is one of the most common reasons for rejection. Bad lighting can create shadows, highlights, or uneven tones that obscure your face or the background, making it difficult to identify you properly. Harsh shadows on your face or on the background are unacceptable and often lead to photo rejection.
Here’s what to avoid and keep in mind about lighting:
- Avoid harsh shadows on your face or the background.
- Do not stand directly under bright sunlight to prevent glare and squinting.
- Avoid uneven or dim lighting that makes parts of your face too dark or too bright.
- Use soft, natural light or evenly diffused artificial lighting.
- Stand a few feet away from the background to prevent shadow casting.
- Make sure the light source is positioned in front of you, not behind.
Proper lighting ensures your facial features are clearly visible and your photo meets the official quality standards required by US authorities.
Incorrect Facial Expression
Many applicants mistakenly treat visa photos like casual selfies, which leads to the wrong facial expressions. However, visa photos require a neutral and natural look to ensure your identity can be verified easily. This means:
- No smiling or showing teeth.
- No frowning, laughing, or exaggerated facial expressions.
- Keep your mouth closed and your lips relaxed.
- Keep both eyes open and look directly into the camera.
- Avoid raising your eyebrows or tilting your head for effect.
Think of it as taking a “passport-style” photo rather than a social media selfie. The goal is to have a calm, relaxed, and neutral expression that matches your usual appearance, making it easier for border officials to identify you. Even small changes in expression can result in rejection, so keep it simple and straightforward.
Wrong Head Position or Angle
The position and angle of your head are critical in ensuring your visa photo is accepted. Many people unintentionally tilt their heads or turn to the side, which violates official guidelines. The photo must show a clear, frontal view of your full face.
Important points to remember:
- Keep your head straight and centered in the frame.
- Face the camera directly, not tilted or turned.
- Ensure your full face is visible, including both ears.
- Keep your eyes open and clearly visible.
- Avoid any hairstyles, hair strands, or accessories that cover your eyes or face.
- Glasses are generally not allowed unless medically necessary (without glare or tinted lenses).
A correctly positioned head in your photo helps officials easily compare your photo to your real face, which speeds up your visa approval process.
Technical Aspects to Avoid
When taking your visa photo at home, it’s crucial to avoid relying on any filters or heavy editing that could alter your natural appearance. Visa photos must represent your true, unaltered look, so using Photoshop, color filters, or artificial backgrounds is strictly prohibited. These edits can distort your facial features or create inconsistencies that cause rejection. The photo should be clear, natural, and professional, with no embellishments that might confuse identity verification systems.
Another technical aspect to watch out for is the quality of the camera and its settings. Using a low-quality camera or settings that reduce sharpness and clarity can result in a blurry or pixelated image, which fails to meet visa photo standards. It’s best to use the highest resolution available on your device and ensure the photo is well-focused. A high-quality image makes it easier for officials to confirm your identity and avoids unnecessary delays in your visa process.
Environmental Factors to Avoid
Your environment plays a surprisingly big role in whether your visa photo is accepted or rejected. The background must be completely plain—preferably white or off-white—with no objects, patterns, or distractions behind you. A cluttered or busy background takes focus away from your face and violates US visa photo rules. Even small distractions can cause your photo to be denied.
In addition, watch out for glare, reflections, or shadows on your face or the background. Shadows behind your head or across your face can interfere with the clarity and uniformity of the photo. Reflections from glasses or shiny objects can also cause problems. Make sure to check the lighting carefully and adjust your position to eliminate any unwanted visual effects before taking the photo.
Common Visa Photo Rejection Reasons
Many visa applicants get frustrated when their photos are rejected, often for reasons that seem minor but are essential for compliance. Below is a table summarizing the most common rejection causes and why they matter:
| Reason | Explanation | Impact | How to Avoid |
| Wrong size or dimensions | Photo not exactly 2×2 inches or incorrect head size. | Photo rejected outright. | Use a ruler or online tools to check size. |
| Visible shadows | Shadows on face or background obscure features. | Photo clarity is compromised. | Use even lighting and move away from background. |
| Wearing glasses with glare | Glare hides eyes or distorts face appearance. | Eyes must be visible clearly. | Remove glasses or adjust lighting angle. |
| Smiling or making expressions | Non-neutral facial expressions are disallowed. | Photo not compliant with standards. | Maintain neutral expression. |
| Background not plain white | Patterns or colors distract from the face. | Violates background rules. | Use plain white/off-white backdrop. |
| Blurry or poor-quality image | Low resolution or out-of-focus photos. | Identity verification fails. | Use a high-res camera and steady the device. |
Knowing these common pitfalls helps you avoid wasting time and money by ensuring your photo meets all official requirements before submission.
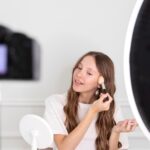
Tips for Taking a Perfect Visa Photo at Home
Want to make your visa photo stand out (in a good way)? Start by using natural daylight from a nearby window. This soft, diffused light evenly illuminates your face without creating harsh shadows or glare. However, avoid standing directly under sunlight, which can cause squinting or overexposure. Instead, position yourself a few feet away from a plain white or off-white wall to create the clean background required.
Next, make sure your camera is at eye level for a straight-on shot. Use a tripod or place your camera on a steady surface to avoid blurry or shaky photos. Keep a neutral facial expression—mouth closed, eyes open, and relaxed face—just like an official passport photo. Taking these simple steps can drastically improve your chances of getting an accepted visa photo the first time around.
How to Check Your Visa Photo Before Submission
Before you hit submit, don’t skip the verification step! Many official government websites offer free online visa photo validators. These tools automatically check your photo for compliance with size, background, facial positioning, and other technical requirements. Using these validators can catch mistakes that you might miss on your own, saving you from costly reshoots or delays.
Additionally, these online checks often provide instant feedback, telling you exactly what to fix—whether it’s adjusting the background color or repositioning your head. This pre-submission review is a simple, effective way to ensure your photo meets US visa standards and increases your chances of smooth processing.
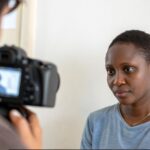
When to Consider Professional Help
Although taking your visa photo at home is convenient and cost-effective, it’s not always the best choice for everyone. If you lack proper lighting, equipment, or a suitable background, the risk of rejection increases. Professional photo studios specialize in visa and passport photos and know all the official requirements inside out. They typically guarantee your photo will be accepted, which can save you time, stress, and money in the long run.
If your visa application is particularly urgent or important, investing in a professional photo might be worth the extra cost. Studios often provide additional services such as immediate digital copies and printouts that comply with government standards. So, if you’re unsure about your setup or want peace of mind, don’t hesitate to get professional help.